Comment tool basics

The comment tool in Word provides a way for you to add comments to a document that are displayed separately from the main text. Comments do not interfere with the main text or its formatting and you can switch between seeing them or not seeing them if you want.

This posting explains some key elements of using them, but for more detail see the Microsoft website .

Adding a comment

To add a comment, highlight a section of text and then select New Comment from the Review tab of the Ribbon

clip_image001

A blank comment box will appear to the right of the text in which you can write your comment, as shown below.

clip_image002


Setting the colour of comments

Your comment box may be a different colour to what is shown above. You can set the colour options using the options under Review > Track Changes > Change Tracking Options.

clip_image003

A window will open with many option for tracked changes, but in the top section you will find one for Comments. In the screenshot below the colour Teal is applied to comments.

clip_image004


Deleting a comment

To delete a comment, place your cursor in the comment and select the Delete command from the Review tab

clip_image005


Hiding comments

If you want to keep the comments there, but not see them, there are a couple of ways to do this. One is to deselect Comments from the list that appears when you click on Show Markup on the Review tab, as shown below.

clip_image006


Long comments

If your document has lots of long comments, they will eventually be partly hidden. This is indicated by a small … symbol that shows in the bottom right of the comment box as shown below.

clip_image007

To see the part of the comment that is not showing, simply click on the … symbol. A new pane will open on the left of the screen showing the entire comment.

OneNote’s docking feature

OneNote’s docking feature is really useful for when you are taking notes from other documents. It produces a narrow version of OneNote which stays put even when you change the document or programme that is open in the other pane. This means you can switch between browsers, documents and spreadsheets to take notes on, and have them visible while you take notes. This is how it looks.

clip_image001

The Dock to Desktop button is already located in the Quick Access Toolbar. Give it a second to work as it has to rearrange things on your desktop.

clip_image002

I added the Normal View button to the Quick Access Toolbar to make it easier to get back out of the docked view when I needed to. You do this through the Customise the Quick Access Toolbar > More commands option on the drop down that you can open at the very right of the Quick Access Toolbar.

Highlighting text in Word with a full range of colours


Word’s highlighting tool has only 15 colours, many of which are too dark to be useful. You can highlight text using your choice of any colour though using the shading tool. You will see this on the Home ribbon in the Paragraph tools.

image

Select the text you want to highlight and then choose your colour from the wide range of options or use the More colors tool to customise even further.

image

Just three things to note which make using this tool slightly different from the highlighting tool.

  1. If your selection also includes a paragraph mark, the whole paragraph will become coloured, not just the sentence you select. Just make sure not to include the paragraph mark (stop at the full stop) if you don’t want this to happen.
  2. To un-highlight you need to use the same shading tool.
  3. You can’t un-highlight a sentence by selecting the whole paragraph and un-shading that. You need to select the sentence itself or part of the paragraph that includes that sentence.

Stopping table rows from breaking across pages

Sometimes it’s inevitable that tables need to be on more than one page. In that case it is usually best for the break to be between rows not within them. That way people can read the whole row before turning the page. It is easy to get Word to do this automatically. Here is how.

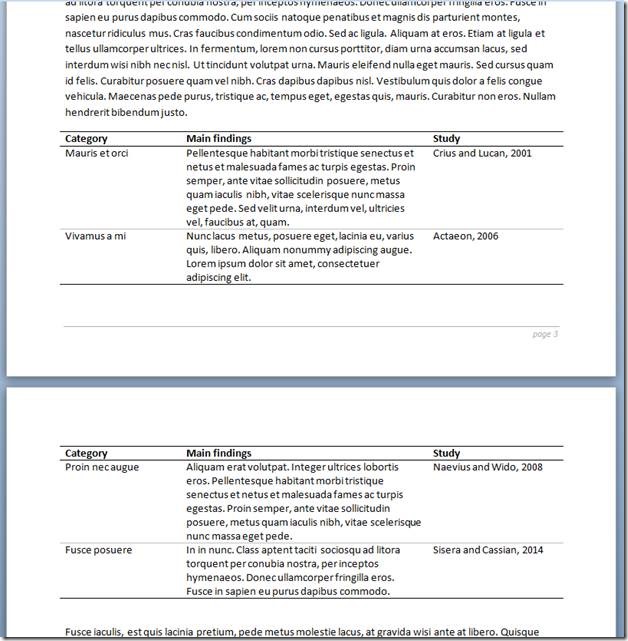
Below is an example of a table breaking across a page in the middle of a row

clip_image002

Select the entire table and then go to Table Tools > Layout > Properties.

clip_image004

A new window like this seen below will open. On the  Row tab, untick Allow row to break across pages. Then click OK.

clip_image005

And now your table will break between the rows rather than in the middle of them, even if you move the table about in the document.

clip_image007

Done!

Repeating headers when a table breaks over a page

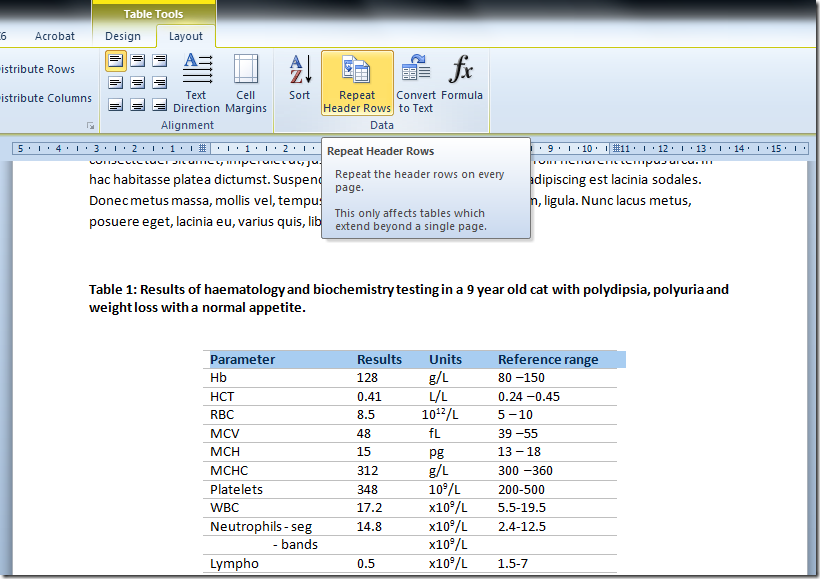
It is often best to format documents so that the whole table appears on one page, but sometimes you have no choice and the table has to span multiple pages. In that case, you really need to repeat the headers at the top of each page. You could insert a copy of the header row at the top of each page, but if you change any formatting or positioning this will be in the wrong place. Word can do this for you automatically with a simple click of a button. There are screenshots below, but if you want to get to the answer quickly, just go to the Table Tools > Layout ribbon and click Repeat Header Rows with the top row of your table selected.

Here are some screenshots to show you what I mean. Here is the table breaking over two pages:

image

Select the header row and then on the Table Tools > Layout ribbon click Repeat Header Rows.

image

And now the table looks like this.

image

Done!

replacing paragraph symbols that are not paragraph marks

Today I opened a text file that contained paragraph symbols when opened in Word, but which when opened in notepad was one long line. Here is the view in Word. Note that there are line breaks before the end of the column. The paragraph symbols therefore appear to be functioning as paragraph marks.

clip_image001

Here is the same section of text opened in Notepad with wordwrap on to fit the text to the window. Note there are no line breaks and if I turned wordwrap off, it would appear as one long line.

clip_image002

For my purposes I needed the document to have line breaks at the places indicated by the paragraph symbols. The document was quite long – some 500 or so line breaks were needed so I didn’t want to do this manually.

At first it seemed like a simple search and replace operation would work. However Word did not recognise the paragraph symbol as either a paragraph mark ^p or a paragraph character ^v when I selected these as options in the find and replace dialogue. I also copied one of the symbols and pasted it into the find box, however it pasted in as a space.

Thanks to Tony Jollans from www.WordArticles.com who posted a solution in a pcreview.co.uk forum: http://www.pcreview.co.uk/forums/paragraph-mark-not-paragraph-mark-t4023273.html

His suggestion was to use ^013 as the search term and this worked perfectly. I was able to search for all 500 symbols and replace them each with a paragraph mark in one hit. ^013 is the ascii code for a carriage return.

Overlaying images to compare them

You can make one image partially transparent if you want to compare two images in either Word or Excel.

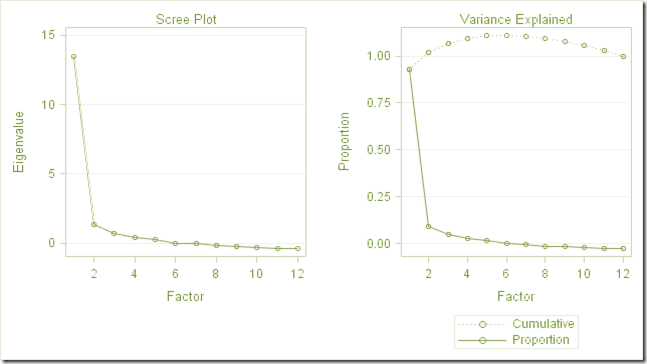
For example, imagine you want to compare this image:

clip_image001

with this one:

clip_image002

First change the colour of the second image so it’s more obvious which is which. Select the image and then go to the Picture Tools ribbon and select Color and choose a colour from the Recolor options.

clip_image003

Here I chose a green colour

clip_image004

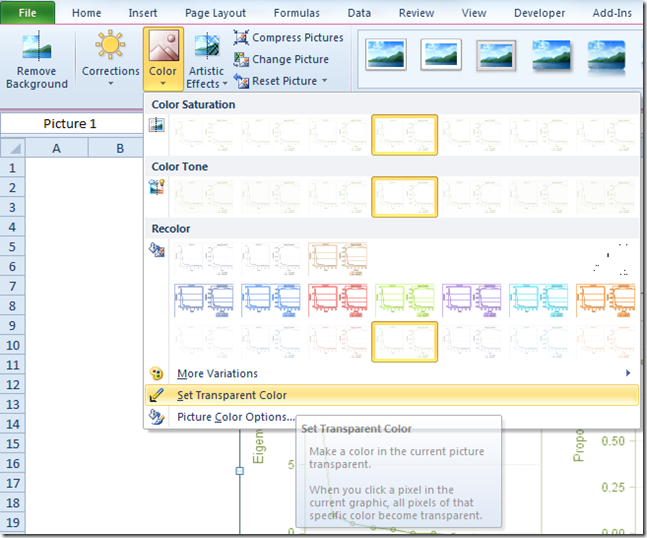
Then make the white areas transparent. Select the image again and on the Picture Tools ribbon select Color > Set Transparent Color.

clip_image005

The cursor will change to a pen symbol. Click on a white area of the image to make that area transparent.

If you are doing this in Excel you can now drag one image over the other to compare them. clip_image006

If you are doing this in Word you need to change the wrap text settings before you can overlay the two images. Select the second (green) image and on the Picture Tools ribbon select Wrap Text > In Front of Text. You can then drag it into position over the first image.

image

Done!

Show two different pages from a pdf document side by side

In Adobe Reader or Acrobat, with the document open click on Window > New Window

clip_image002

The document will open a second time in a new window. Now move to the page you want and rearrange the two windows on your screen to show whichever combination of pages you want.

This is really useful for looking at a figure while reading text, or checking a reference list while looking at text.

clip_image004

Adding line numbers in Word


To add line numbers to a word document go to Page layout > Page Setup > Line Numbers. I like to control the options so I select Line Numbering Options from the dropdown list.

image


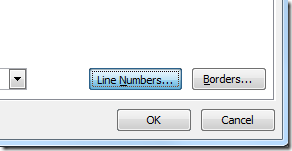
On the Page Setup window that opens click on Line Numbers at the bottom right.

image


The select the options you would like. I find numbering every line distracting so I tend to set the Count by to 5, which only numbers every 5th line.

image

Click on ok and you are done.
And this is the final result.

image

Using the navigation pane in Word


The Navigation Pane in Word is a really neat tool when you are working with any document that contains several (or more) sections. It allows you to see your document structure, change the levels of headings easily and rearrange sections of work with a simple drag and drop action. This posting explains how to use these features in Word.

Go to View > Show > Navigation Pane to open the navigation pane in Word.

clip_image001

A left hand pane will open which is the Navigation Pane. If your document contains no headings styles it will say so. (If you don’t use heading styles you should – here is post that explains how). However if you have used heading styles throughout your document it will show them like this.

clip_image002

Notice how the headings are shown with indents indicating the different levels, making it easy to see how the document is organised.

Expand and collapse sections using the triangles
  • A triangle indicates headings that have subheadings and clicking on the triangle allows you to expand or collapse the subheadings.
Use the Navigation Pane to get around your document
  • Clicking on any of the headings takes you straight to that part of the document so you can use it as a quick way to get around a large document.
Use the right click menu to control what you see, change heading levels and print and delete specific sections
  • Right clicking on any of the headings in the Navigation Pane brings up the right click menu which has some handy tools.

clip_image004

  • Use the Expand All, Collapse All and Show Heading Levels tools to control how many levels of subheadings you see.
  • Use the Promote and Demote tools to change the level of individual headings. Their subheadings will also change correspondingly and so will the look of the heading.
  • Use Print Heading and Content to print out only specified sections of the document.
  • Use the Delete to delete both a heading and the content that is under that heading.
Use drag and drop to rearrange sections
  • The Navigation Pane also has a very handy drag and drop feature. Just click and hold the left mouse button on the heading of the section you want to move and drag it to a new place on the navigation pane. The heading and all the text below it will be moved. Any subsections will also move with it.